Feeling crafty? Want to upcycle those empty bottles? Drilling a hole in a glass bottle opens up a world of DIY possibilities!
To drill a hole in a glass bottle, you’ll need a glass drill bit or a diamond hole saw, water for cooling, and a steady hand. Apply gentle pressure at slow speed. It’s also wise to secure the bottle and wear safety gear.
Interested in learning the specifics? Keep reading, and I will show you how!
Which Drill Bit is Best for Drilling Glass?
Ever tried drilling into glass with a regular bit? It’s a recipe for disaster! I learned this the hard way when I first started experimenting with turning old wine bottles into lamps.
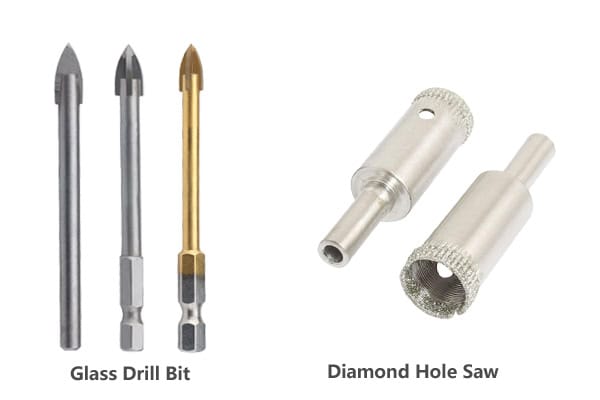
For drilling glass, glass drill bits or diamond hole saws are the best. These bits grind through the glass rather than cutting, which reduces the risk of shattering. Carbide-tipped bits can also work, but glass drill bits or diamond hole saws are generally preferred.
Understanding Glass Drill Bits and Diamond Hole Saws
Choosing the right drill bit is important, but knowing why certain bits work better can save you a lot of frustration. Glass drill bits and diamond hole saws excel because glass is a hard, brittle material. Standard drill bits designed for wood or metal are too aggressive. They generate too much heat and pressure, causing the glass to crack or shatter. Glass drill bits and diamond hole saws1, on the other hand, gently grind away the material. Think of it like sanding, but on a smaller scale.
There are two main types of diamond tools to consider:
| Tip | Tanım | Pros | Cons |
|---|---|---|---|
| Cam Matkap Uçları | Solid bits specifically designed for glass. Good for smaller holes. | Affordable, easy to find in various sizes. | Can take longer to drill larger holes. |
| Diamond Hole Saws/Cutters | Cylindrical tools with a diamond-coated edge. Best for larger holes. | Faster for larger holes, creates cleaner edges. | More expensive than drill bits. |
When selecting, consider the size of the hole you need and the thickness of the glass2. For delicate projects, err on the side of caution and opt for a slower-cutting bit. This gives you more control and reduces the chance of mistakes. Tenyu could customize the logo3, to meet more customers’ needs.
What is a Safe Way to Break a Glass Bottle?
Sometimes, despite our best efforts, a glass bottle breaks. It happens! Knowing how to handle it safely is key.
If you need to intentionally break a glass bottle, wrap it in a towel or blanket first. This contains the shards and prevents them from scattering. You can also break it inside a container like a trash bin.
Safe Disposal Methods for Glass
Accidents happen, especially when working with glass. If you need to dispose of a glass bottle safely, or if you’re intentionally breaking one for artistic reasons4 (like creating mosaics), these methods can minimize the risks5:
- The Towel Method: Wrap the bottle in a thick towel or blanket. This will absorb much of the impact and keep the glass pieces contained. Strike the wrapped bottle with a hammer or against a hard surface.
- The Container Method: Place the bottle inside a sturdy container, such as a trash bin or cardboard box. Add layers of cushioning material like newspaper or bubble wrap around the bottle. Then, break the bottle inside the container.
- The String and Flame Method: This method is more controlled but requires caution. Soak a string in a flammable liquid like acetone or alcohol. Wrap the string tightly around the bottle where you want it to break. Light the string on fire and let it burn for a minute or two. Quickly dunk the bottle in cold water. The sudden temperature change should cause the glass to break along the string line. (Note: This method is better for kesme a bottle rather than shattering it completely.)
- Duct Tape Wrapping: Wrap the top and bottom of the bottle with duct tape, leaving a section exposed in the middle. The exposed section will be the breaking point, and the tape helps hold the other pieces together.
Regardless of the method you choose, always wear safety glasses and gloves to protect yourself from flying shards.
How can I Properly Drill a Glass Bottle?
Okay, so you’ve got the right bit and you know how to (safely) break a bottle if things go south. Now, let’s get down to the actual drilling process.
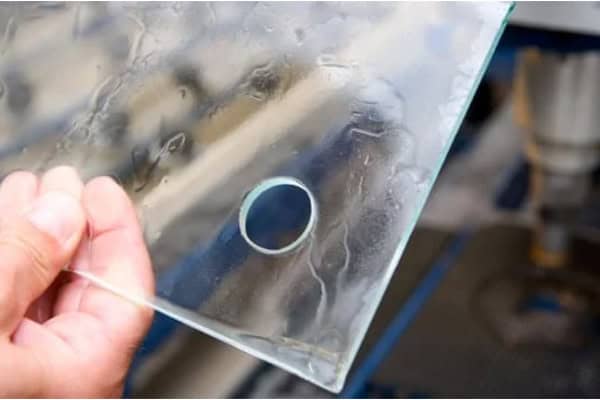
To properly drill a glass bottle, secure the bottle, mark your drilling spot, and create a dam with putty. Use a slow speed, apply water constantly to keep the bit cool, and let the drill do the work. Don’t force it! When using a glass drill bit, maintain consistent pressure and keep the area lubricated.
Step-by-Step Drilling Guide with a Glass Drill Bit
Drilling glass requires patience and precision. Let’s walk through the process, using a glass drill bit:
- Preparation is Key: Clean the bottle thoroughly and let it dry. This ensures a good grip for the drill bit and prevents contaminants from interfering.
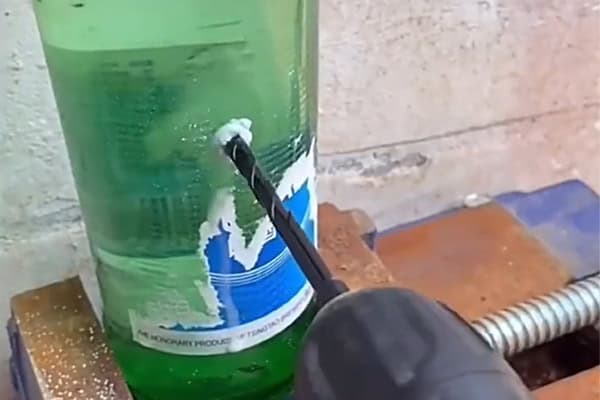
- Secure the Bottle: Place the bottle on a stable surface and secure it. A towel or rubber mat underneath can prevent slipping. Clamps can also be used, but be careful not to overtighten them, which could crack the glass.
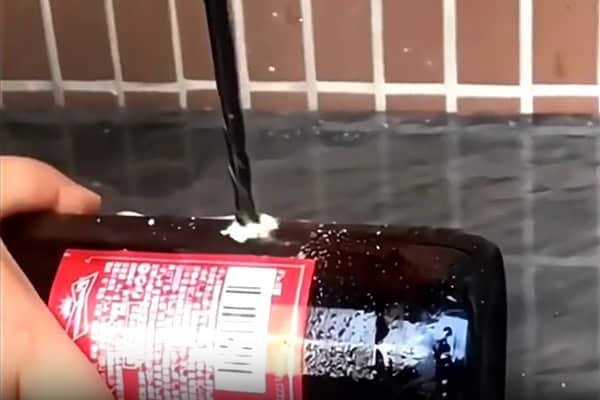
- Marking and Creating a Dam: Use a marker to indicate the exact spot where you want to drill. Creating a dam around the marked area with plumber’s putty or modeling clay is really helpful. This will hold water in place, keeping the drill bit cool and lubricated.
- Start Slow, Stay Cool: Insert your glass drill bit into the drill. Dip the tip of the drill into water. Position the drill bit on the marked spot and start drilling at a very slow speed. Apply gentle, consistent pressure. Let the drill do the work; don’t force it.
- Water is Your Friend: Continuously apply water to the drilling area. A small squeeze bottle or a sponge soaked in water works well. The water keeps the glass and the drill bit cool, preventing overheating and cracking.
- Maintain Consistent Pressure: With a glass drill bit, consistent, gentle pressure is key. Avoid jerky or sudden movements.
- Take Breaks: After drilling for 20-30 seconds, stop and let the glass cool down. This prevents thermal stress from building up.
- Clean Up the Edges: Once you’ve drilled through the glass, use fine-grit sandpaper or a diamond file to smooth the edges of the hole. This removes any sharp fragments and makes the hole safer to handle.
The Ultimate DIY Lighting Guide: Drilling Glass
Want to create unique lighting fixtures6 from glass bottles7? Drilling is essential! It is so cool to transform an old bottle to something new.
Drilling glass is essential for DIY lighting projects. It allows you to run electrical cords through the bottle, creating custom lamps and pendants. Remember to prioritize safety and use the correct drill bits.
Creating Custom Glass Lighting
Creating custom lighting from glass bottles is a rewarding DIY project. Here’s how to make your project shine:
- Choosing the Right Bottle: Thicker glass bottles are generally easier to drill and more durable for lighting applications. Consider the shape and size of the bottle to match your desired aesthetic.
- Cord Placement: Plan where you want the cord to enter and exit the bottle. Typically, you’ll drill a hole near the base for the cord to enter, and another hole near the top for the bulb socket.
- Safety First: Always disconnect the power before working with electrical components. Use insulated wire and ensure all connections are secure and properly shielded.
- Bulb Selection: Choose a bulb that doesn’t generate excessive heat. LED bulbs are an excellent option because they are energy-efficient and produce very little heat, reducing the risk of the glass overheating.
- Adding Flair: Get creative with your design! You can add decorative elements like beads, paint, or fabric to the bottle to personalize your lighting fixture.
- Alternative light source: I tested that by drilling a hole in a wine bottle and it took a long time. So now I'm thinking maybe drill just one hole towards the backside where it's least visible.
Çözüm
Drilling a hole in a glass bottle might seem intimidating, but with the right tools, techniques, and a healthy dose of patience, you can safely unlock a world of creative possibilities!
-
Learn about the functionality of diamond hole saws and how they can make your glass drilling tasks easier and more efficient. ↩
-
Learning about glass thickness can improve your project outcomes and ensure safety and durability in your work. ↩
-
Exploring logo customization strategies can help businesses connect better with their audience and enhance brand identity. ↩
-
Discover creative and safe techniques for breaking glass to use in art projects like mosaics. ↩
-
Explore effective strategies to reduce risks associated with handling and breaking glass safely. ↩
-
Explore innovative designs and techniques for creating stunning lighting fixtures from recycled glass bottles. ↩
-
Discover various ways to repurpose glass bottles, including unique home decor ideas that can enhance your living space. ↩


