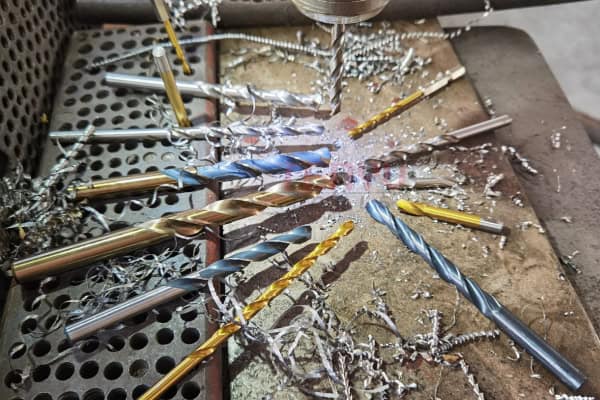
Ever wondered what makes a High-Speed Steel (HSS) drill bit stand out? Let’s dive into the world of drill bits and uncover the secrets behind their performance and versatility.
HSS drill bits are essential tools for both professionals and DIY enthusiasts. Known for their durability and heat resistance, they can tackle a variety of materials with precision. Whether you’re drilling into wood, metal, or plastic, understanding HSS drill bits can enhance your projects and ensure smooth results.
Drilling the right hole starts with the right bit. Let’s explore how to choose and identify the best HSS drill bits for your needs.
What is the History of Drill Bits?
Have you ever thought about where drill bits come from and how they’ve evolved over time?
The history of drill bits dates back thousands of years, evolving from simple hand tools to the advanced HSS drill bits we use today.
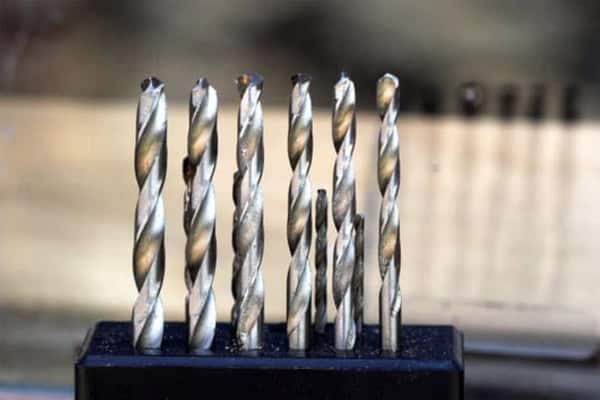
Drilling has been a fundamental human activity since ancient times. Early civilizations used basic flint and stone tools to create holes in wood and bone. As metalworking techniques advanced, so did the design and materials of drill bits. By the Industrial Revolution, drill bits became more standardized, leading to the development of High-Speed Steel (HSS) in the early 20th century. HSS revolutionized drilling by allowing bits to withstand higher temperatures and perform more efficiently, making them indispensable in modern manufacturing and construction.
Evolution of Drill Bit Materials
The transition from stone to metal marked a significant advancement. Early metal bits were made from simple steel, but the introduction of HSS provided greater strength and heat resistance. This evolution allowed drill bits to cut through harder materials without losing their sharpness or integrity.
Technological Innovations
With the advent of machinery, drill bits could be produced with greater precision and consistency, enhancing their performance and reliability. Innovations such as carbide tips, coatings like titanium and cobalt, and improved manufacturing processes have further advanced the capabilities of drill bits.
Impact on Industries
The development of HSS drill bits greatly impacted various industries, including automotive, aerospace, and construction1, by improving the efficiency and quality of drilled holes. These advancements enabled the creation of more complex structures and machinery, driving progress and innovation across multiple fields.
Personal Anecdote: My First Encounter with Drill Bits
I remember the first time I truly appreciated the importance of a good drill bit. I was working on a woodworking project, and my old bits kept dulling and breaking. Frustrated, I decided to invest in a set of HSS drill bits. The difference was night and day. Not only did they last longer, but they also made the drilling process smoother and more precise. It was a game-changer for my projects, and it sparked my interest in learning more about the tools I use.
How to Identify HSS Drill Bits?
Not sure if you’re holding an HSS drill bit or something else? Let’s clarify how to spot these versatile tools.
Identifying HSS drill bits is straightforward once you know what to look for. They come in various types like HSS4241, HSS4341, HSS6542 (M2), M35, and M42, each suited for different materials. Typically, they have a high-gloss finish and are marked with "HSS" on the shank or body. Their robust construction and sharp cutting edges are key indicators of their quality and performance.
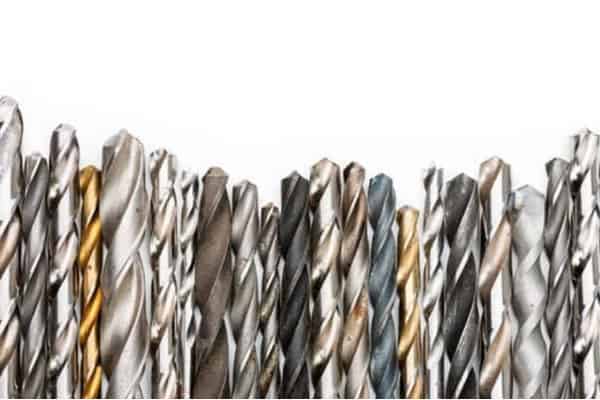
When selecting a drill bit, look for the markings that indicate it’s made from High-Speed Steel. HSS bits often have a shiny appearance due to their hardened steel composition. Additionally, the design usually features a pointed tip and sharp flutes that help in efficient material removal. Understanding the different types of HSS, such as HSS4241 and HSS4341 for softer metals like iron, and HSS6542 (M2), M35, and M42 for harder materials like stainless steel, ensures you choose the right bit for your drilling tasks, enhancing both precision and longevity.
Markings and Labels
Most HSS drill bits will have "HSS" stamped on them, making it easy to identify. Additionally, numbers like 4241 or 6542 indicate the specific type of HSS, guiding you on its best use. These markings are usually found near the shank or along the body of the bit.
Physical Characteristics
Look for a high-gloss finish and sharp cutting edges, which are hallmarks of HSS drill bits. The type number often hints at the bit’s suitability for different materials. For example, HSS4241 and HSS4341 are excellent for drilling into softer metals like iron, while HSS6542 (M2), M35, and M42 are better suited for harder materials like stainless steel.
Importance of Quality
High-quality HSS bits provide better performance and last longer, making them a worthwhile investment for any toolkit. Choosing the right type ensures your projects are completed efficiently and effectively. Investing in quality bits2 can save you time and money in the long run, as they reduce the need for frequent replacements and minimize the risk of damaging your workpieces.
Real-World Example: Choosing the Right HSS Bit
Imagine you’re working on a metalworking project that involves drilling into both iron and stainless steel. Using the right HSS drill bit for each material is crucial. For the iron, you might choose an HSS4341 bit, known for its ability to handle softer metals with ease. For the stainless steel, an HSS6542 (M2) bit would be more appropriate, offering the durability and heat resistance needed to drill through tougher material without losing its edge.
Can I Just Measure the Diameter of a Drill Bit with a Rule?
Thinking of using a simple ruler to measure your drill bit? Let’s see if that’s the best approach.
While using a ruler to measure the diameter of a drill bit is possible, it’s not the most accurate method. For precise measurements, calipers or a drill gauge are recommended to ensure the correct size for your project.
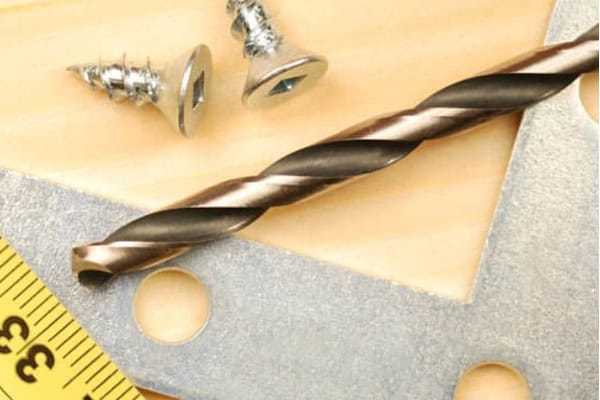
Measuring drill bit diameter with a ruler can be tricky due to the small sizes and the need for precision. Rulers might not provide the exact measurement you need, leading to errors in your drilling projects. Instead, using digital or vernier calipers can give you a more accurate reading. Alternatively, a drill gauge specifically designed for measuring drill bits can ensure you get the precise size required, avoiding any potential mishaps in your work.
Limitations of Using a Ruler
Rulers lack the precision needed for small measurements, making them less reliable for accurate sizing. The small increments and potential for parallax error can lead to inaccurate readings, especially for drill bits with diameters less than a centimeter.
Benefits of Calipers
Calipers provide precise measurements down to fractions of a millimeter, ensuring accuracy3 in your projects. They are versatile tools that can measure both internal and external dimensions, making them ideal for a variety of applications beyond just measuring drill bits.
When to Use a Drill Gauge
A drill gauge is perfect for quickly and accurately measuring drill bit sizes, especially for smaller diameters. It’s a specialized tool designed specifically for this purpose, making it easier to get consistent and reliable measurements without the hassle of interpreting markings on a ruler or caliper.
Personal Insight: The Importance of Accurate Measurements
In my early projects, I underestimated the importance of accurate measurements. Using a ruler led to several misaligned holes, which compromised the integrity of my work. Switching to a drill gauge made a world of difference, ensuring that each hole was drilled to the exact specifications needed. This experience taught me the value of investing in the right tools for precision tasks.
How to Choose the Right Size Drill Bit?
Choosing the wrong size drill bit can ruin your project. Let’s make sure you get it right every time.
Selecting the right size drill bit depends on the material you’re working with and the size of the hole you need. It’s essential to consider factors like drill bit diameter, length, and type to ensure optimal performance and accuracy in your drilling tasks.
When choosing a drill bit size, start by determining the exact diameter required for your hole. Consider the material you’re drilling into, as harder materials may require larger or more durable bits. Additionally, the length of the drill bit should match the depth of the hole you need. For precision work, using a drill bit set can help you select the exact size needed. Always double-check your measurements and choose a bit that matches your project specifications to achieve the best results.
Determining Hole Diameter
Accurate measurement of the hole diameter is crucial for selecting the appropriate drill bit. Start by marking the exact spot where you need the hole and use a template or guide to ensure consistency across multiple holes. Consider using a center punch to create a small indentation, which helps prevent the drill bit from slipping during the initial phase of drilling.
Material Considerations
Different materials require different types of drill bits; for example, wood vs. metal. Remember, HSS4241 and HSS4341 are great for softer metals, while HSS6542 (M2), M35, and M42 handle harder materials like stainless steel4. Additionally, the hardness and brittleness of the material can affect the choice of drill bit. For instance, ceramic and glass require specialized bits to prevent cracking and chipping.
Bit Length and Application
Ensure the drill bit length matches the depth required for your project to avoid incomplete drilling. For deeper holes, you might need an extended-length bit or use a drill bit extension. The application also influences the choice; for example, a shallow hole in wood might require a shorter bit, while drilling through thick metal would necessitate a longer, more robust bit.
Drill Bit Type
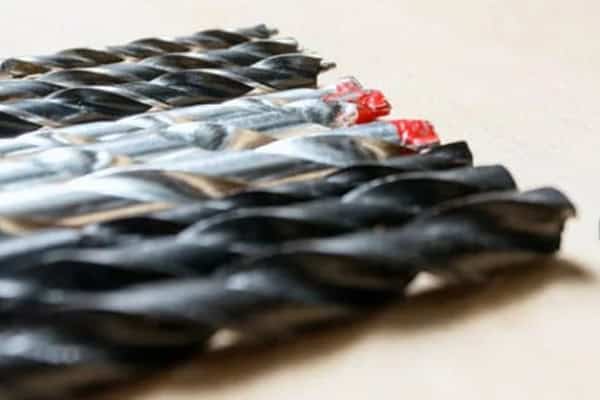
Choose based on application (e.g., twist, spade, auger). Twist bits are versatile and commonly used for general-purpose drilling, while spade bits are ideal for larger holes in wood. Auger bits are excellent for deep, clean holes in wood, and masonry bits are designed for drilling into concrete and stone.
Woodworking Drills vs. Twist Drills
Although twist drills can drill wood and plastic, woodworking drills are more suitable for wood. Woodworking drills are specifically designed to handle the fibers and density of wood, providing cleaner and more precise holes with less effort. They often feature sharper points and specialized flute designs to reduce splintering and ensure smooth drilling.
| Factor | Consideration |
|——————–|——————————————————–|
| Hole Diameter | Measure accurately to choose the right bit size |
| Material | Select bits designed for specific materials |
| Bit Length | Match bit length to the required drilling depth |
| Drill Bit Type | Choose based on application (e.g., twist, spade) |
Personal Story: The Right Bit Saved My Project
Once, I was working on a metal frame for a custom bicycle. Initially, I used a standard HSS bit, but it kept overheating and losing its edge. Frustrated, I switched to an HSS6542 (M2) bit designed for harder metals. Not only did it cut through the stainless steel effortlessly, but it also maintained its sharpness throughout the project. This change not only saved time but also improved the overall quality of my work.
Advanced Tip: Using a Bit Sharpener
To extend the life of your drill bits, consider using a bit sharpener. Regularly sharpening your bits ensures they maintain their cutting efficiency and prolongs their lifespan. A sharp bit reduces the risk of overheating and minimizes the effort required for drilling, making your work easier and more precise.
118 vs 135 Drill Bits: Does it Matter?
Confused by the numbers 118 and 135 on drill bits? Let’s clear up the confusion.
The numbers 118 and 135 refer to the tip angles of the drill bits. Understanding these angles helps in selecting the right bit for your specific drilling needs, ensuring precision and efficiency in your work.
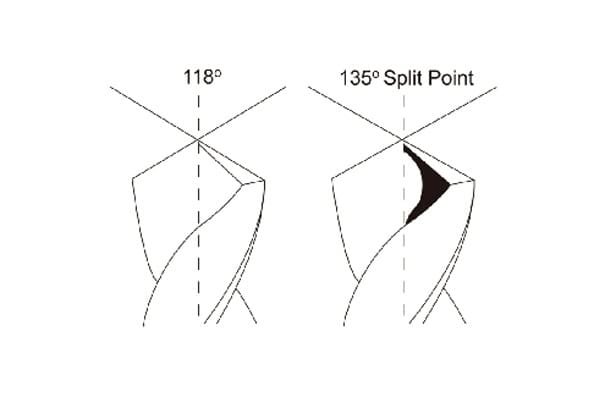
When you see numbers like 118 or 135 on drill bits, they typically indicate the bit’s tip angle. A 118-degree angle is the standard for most materials and provides a good balance between cutting efficiency and durability. On the other hand, a 135-degree angle is sharper and better suited for harder materials, offering a cleaner cut and reducing the risk of bit breakage. Choosing the right angle based on the material you’re working with can make a significant difference in the quality of your drilled holes and the lifespan of your drill bits.
Understanding Tip Angles
Different tip angles affect how the drill bit interacts with the material. A 118-degree angle is versatile and works well for general-purpose drilling in softer materials like wood and standard metals. In contrast, a 135-degree angle is designed for harder materials, providing a more aggressive cutting action that can penetrate tougher surfaces more effectively.
Impact on Performance
Using the correct angle ensures better drilling performance and reduces the risk of errors or bit damage. A 118-degree bit may become dull more quickly when used on hard materials, while a 135-degree5 bit can maintain its sharpness longer and provide a cleaner finish.
Practical Applications
Choose 118-degree bits for softer materials and 135-degree bits for harder substances like stainless steel to achieve the best results. For example, if you’re working on a woodworking project, a 118-degree bit will provide smooth and precise holes. However, if you’re drilling into stainless steel or other hard metals, a 135-degree bit will offer the necessary strength and cutting ability to handle the task efficiently.
Personal Experience: Choosing the Right Angle
During a renovation project, I had to drill into both hardwood and stainless steel. Initially, I used a 118-degree bit for all tasks, which worked fine for the wood but struggled with the stainless steel. The bit overheated and lost its edge quickly. Switching to a 135-degree bit for the stainless steel made a remarkable difference. The bit cut smoothly through the metal without overheating, and the holes were clean and precise. This experience highlighted the importance of selecting the right tip angle for different materials.
Additional Insight: Specialized Angles
While 118 and 135 degrees are the most common, there are other specialized angles available for specific applications. For instance, some bits feature split points or specialized flute designs to enhance drilling performance in particular materials or under specific conditions. Understanding these nuances can further optimize your drilling tasks and improve overall efficiency.
Why are Drilled Holes Larger than the Drill Bit Used?
Ever noticed that sometimes your holes come out bigger than the drill bit? Here’s why that happens.
Drilled holes can be larger than the drill bit due to factors like material expansion, drill bit wear, or improper drilling technique. Understanding these causes helps in achieving more accurate and consistent hole sizes in your projects.
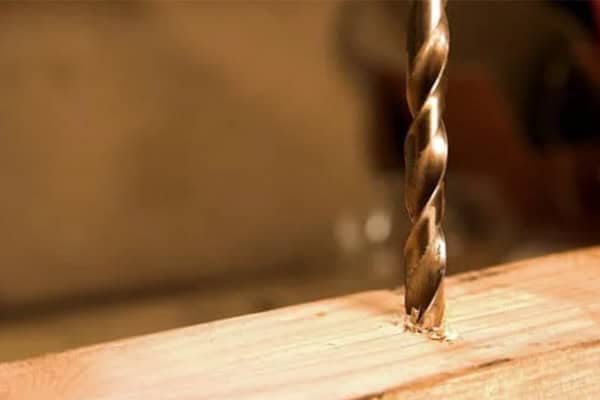
Several factors can contribute to drilled holes being larger than the drill bit itself. Material expansion, especially in metals, can cause slight enlargement of the hole. Additionally, if the drill bit is worn or dull, it may not cut as precisely, leading to larger holes. Incorrect drilling techniques, such as applying too much pressure or not keeping the drill perpendicular to the surface, can also result in oversized holes. To prevent this, ensure your drill bits are sharp, use the right speed and pressure, and maintain proper alignment during drilling.
Material Expansion Effects
Some materials naturally expand when drilled, affecting hole size. Metals, for example, can experience thermal expansion due to the heat generated during drilling. This expansion can cause the hole to become slightly larger than the drill bit itself. Additionally, certain materials may have inherent properties that cause them to stretch or deform under pressure, leading to enlarged holes.
Bit Wear and Maintenance
Regularly maintaining and replacing worn bits ensures consistent hole sizes. A dull or damaged drill bit can wander off course, causing the hole to become larger than intended. Regularly inspect your bits for signs of wear, such as chipping6 or dullness, and replace them as needed. Proper maintenance not only improves the accuracy of your drilling but also extends the lifespan of your bits.
Drilling Technique
Proper technique, including steady pressure and alignment, is crucial for accurate drilling. Applying too much pressure can cause the drill bit to flex or bend, leading to oversized holes. Maintaining a consistent speed and keeping the drill perpendicular to the surface ensures that the bit cuts cleanly and accurately. Using a guide or jig can help maintain alignment and prevent wandering.
Preventative Measures
Use high-quality bits, keep them sharp, and practice proper drilling methods to avoid oversized holes. Additionally, consider using a pilot hole or a center punch to guide the drill bit and prevent it from wandering. Lubricating the drill bit when working with harder materials can also reduce heat buildup and prevent material expansion.
Detailed Analysis: Preventing Oversized Holes
To achieve precise hole sizes, it’s essential to adopt a multifaceted approach. Start by selecting the right type of drill bit for your material and ensuring it is sharp and in good condition. Use a drill press if possible, as it provides better control and alignment compared to handheld drills. If you must use a handheld drill, take extra care to keep it steady and perpendicular to the work surface.
Additionally, consider the environment in which you’re drilling. High temperatures can cause materials to expand, so drilling in a cooler environment or using cooling agents like cutting oil can help maintain material stability. For critical applications, using a drill bit with a built-in gauge or stop can help limit the depth and diameter of the hole, ensuring consistency across multiple projects.
Real-World Example: Fixing Oversized Holes
In one of my projects, I was drilling holes for a metal frame when I noticed the holes were consistently larger than the bits I was using. After some investigation, I realized that the bits were dull and the drilling technique was too aggressive. By sharpening the bits and adopting a more controlled drilling approach, I was able to achieve the precise hole sizes needed for a flawless finish. This experience underscored the importance of bit maintenance and proper technique in achieving accurate results.
Advanced Tip: Using Drill Bit Guides
For projects requiring multiple precise holes, consider using a drill bit guide or jig. These tools help maintain consistent alignment and depth, reducing the likelihood of oversized or misaligned holes. Drill guides can be especially useful for repetitive tasks, ensuring uniformity and saving time in the long run.
Conclusión
Choosing the right HSS drill bit can make all the difference in your projects. I hope this guide helps you drill with confidence and precision.
-
Explaining how HSS drill bits improve drilling performance, durability, and safety in various construction projects, showcasing their practical applications. ↩
-
Offer insights into how superior bits contribute to cleaner cuts and reduce the risk of damaging materials, emphasizing the long-term benefits of investing in high-quality tools. ↩
-
Help users grasp the critical role that precise measurements play in ensuring the reliability and quality of their projects, reinforcing the value of using callipers. ↩
-
Offers users access to comprehensive guides on selecting the right drill bits for this challenging material, ensuring effective and safe drilling. ↩
-
This bit angle is beneficial, particularly in its ability to maintain sharpness and provide cleaner finishes when working with tougher materials. ↩
-
Learn about the causes of chipping during drilling, its effects on hole quality, and strategies to prevent it, thereby improving their overall drilling technique. ↩