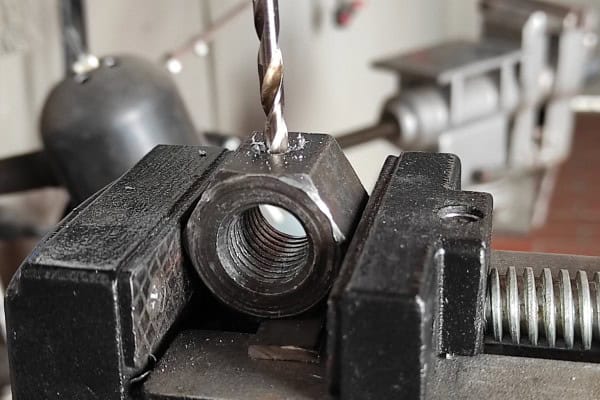
Drilling through hardened steel can seem daunting, but with the right tools and techniques, it’s entirely achievable. Whether you’re a seasoned DIY enthusiast or tackling a new project, understanding the essentials makes all the difference.
When it comes to drilling hardened steel, using the right drill bit is crucial. Cobalt and HSS (High-Speed Steel) bits are top choices, each offering unique benefits. Proper technique and equipment can make the process smoother and more efficient, ensuring clean and precise holes every time.
Let’s dive into the details of how to tackle this challenging task effectively.
What is the Best Type of Drill Bit for Hardened Steel?
Ever stood staring at a piece of hardened steel, wondering which drill bit to reach into the tough metal? I’ve been there, feeling a bit stuck. Choosing the right drill bit can make or break your project.
For drilling hardened steel, Cobalt drill bits are often considered the best choice due to their superior hardness and heat resistance. They maintain their edge longer and can handle the high temperatures generated during the drilling process, making them ideal for tough materials.
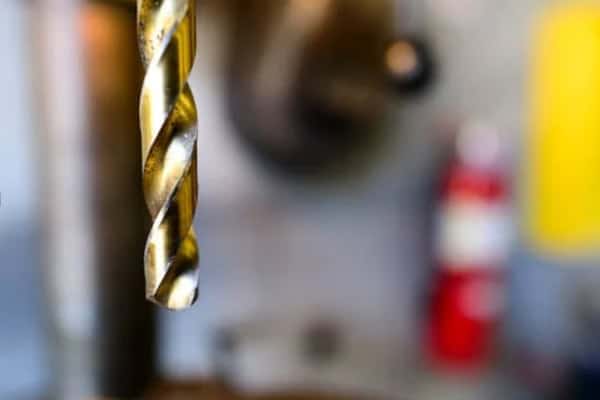
Diving deeper into selecting the right drill bit can really set you up for success. Let’s break down why cobalt bits stand out and how they compare to other options.
Why Cobalt Drill Bits Shine
Cobalt drill bits are specifically designed for drilling through hard metals1. Their composition, typically containing 5-8% cobalt, enhances their durability and heat resistance. This means they can withstand the high temperatures generated when drilling into hardened steel without losing their sharpness.
Benefits of Cobalt Drill Bits:
- Durability: Last longer than standard HSS bits.
- Heat Resistance: Maintains performance under high temperatures.
- Precision: Creates cleaner, more accurate holes.
I remember the first time I used a cobalt bit on a hardened steel project. The difference was night and day—clean cuts without excessive heat build-up. It was a game-changer for me, and since then, I’ve never looked back.
Comparing Cobalt and HSS Bits
While HSS bits are versatile and suitable for a variety of materials, they may struggle with the extreme hardness of certain steels. Cobalt bits, on the other hand, are built to handle these challenges with ease.
| Feature | Kobaltbohrer | HSS-Bohrer |
|---|---|---|
| Material | High-Speed Steel + Cobalt | Hochgeschwindigkeitsstahl |
| Haltbarkeit | Higher | Moderate |
| Heat Resistance | Superior | Moderate |
| Kosten | Higher | Lower |
| Best For | Hardened steel, stainless steel | General purpose drilling |
Choosing the Right Bit for Your Project
Selecting the appropriate drill bit isn’t just about material; it’s also about the specific requirements of your project. If you’re working on something that demands high precision and durability, cobalt bits are your best bet. However, for more general tasks where extreme hardness isn’t a factor, HSS bits can serve you well without breaking the bank.
Personal Anecdote
I once undertook a project to create custom brackets for a metal frame. Initially, I used standard HSS bits, but they quickly dulled and failed to produce clean holes. Frustrated, I switched to cobalt bits, and the results were immediate and impressive. The holes were precise, and the bits lasted much longer, saving me time and effort in the long run.
Maintenance and Care for Drill Bits
Taking care of your drill bits can significantly extend their lifespan and ensure consistent performance. Here are some tips to keep your cobalt and HSS bits in top shape:
- Proper Storage: Keep your bits in a dry, organized space to prevent rust and damage.
- Regular Cleaning: After use, clean the bits with a brush and remove any metal shavings or debris.
- Sharpening: Sharpen dull bits carefully to maintain their cutting efficiency.
- Avoid Overheating: Use appropriate speeds and lubrication to prevent excessive heat buildup.
By following these maintenance practices, you can ensure that your drill bits remain effective and reliable for all your drilling needs.
Can you Cut Hardened Steel with a Drill Bit?
Is it even possible to cut through hardened steel using just a drill bit? I’ve experimented a lot, and the answer might surprise you.
Yes, you can cut hardened steel with the right drill bit and proper technique. Using high-quality bits like cobalt or HSS and applying the correct drilling methods ensures effective cutting without damaging your tools or the material.
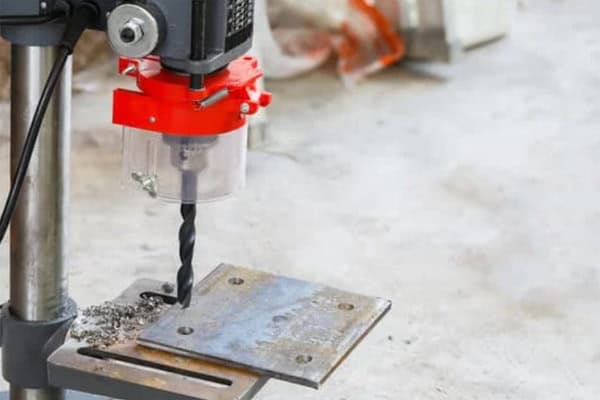
Understanding the mechanics behind cutting hardened steel can help you approach your projects with confidence and the right know-how.
Techniques for Effective Cutting
Cutting through hardened steel requires more than just the right bit; it’s about how you use it. Here are some tips to ensure success:
- Use Slow Speeds: Drilling at slower speeds reduces heat buildup, preserving the drill bit’s integrity.
- Apply Steady Pressure: Consistent pressure helps the bit penetrate the steel without skipping or breaking.
- Lubricate the Area: Using cutting oil can significantly reduce friction and heat, making the drilling process smoother.
- Take Breaks: Letting the drill bit cool down prevents overheating and extends its lifespan.
Personal Insight
I’ve learned through trial and error that patience is key. Rushing the process often leads to frustration and damaged bits. Taking your time pays off with cleaner results and longer-lasting tools.
The Importance of Lubrication
Lubrication plays a critical role in drilling hardened steel. It not only reduces friction but also helps in cooling the drill bit2, preventing it from overheating. Cutting oil or even household lubricants can be used effectively.
Steps to Proper Lubrication:
- Apply Lubricant: Before you start drilling, apply a generous amount of cutting oil to the drilling area.
- Reapply as Needed: During drilling, periodically add more lubricant to maintain its effectiveness.
- Clean After Drilling: Once the hole is complete, clean the area to remove any residual lubricant and metal shavings.
Choosing the Right Drill Speed
Selecting the appropriate drill speed is crucial when working with hardened steel. Too high a speed can cause the bit to overheat, while too low a speed may result in inefficient drilling.
Guidelines for Drill Speed:
- Small Bits (Under 1/4 inch): Use higher speeds for faster drilling but monitor for heat buildup.
- Larger Bits (1/4 inch and above): Use slower speeds to prevent excessive heat and ensure better control.
Personal Anecdote
During a project to install anchors in steel beams, I initially struggled with overheating bits. After adjusting my drill speed and applying more cutting oil, the process became much smoother. The improved technique not only saved my bits but also made the holes cleaner and more precise.
Ensuring Accurate Hole Placement
Accuracy is vital when drilling into hardened steel, especially for projects that require precise measurements and placements. Here are some techniques to ensure your holes are perfectly positioned:
- Use a Center Punch: Mark the exact spot where you want to drill to guide the bit accurately.
- Clamp the Material: Secure the steel firmly to prevent movement during drilling.
- Pilot Holes: Start with a smaller pilot hole to guide the larger drill bit, ensuring better accuracy.
Cobalt or HSS Drill Bits for Hardened Steel?
Choosing between cobalt and HSS drill bits can be confusing. Let’s simplify it by comparing their strengths and ideal use cases.
Cobalt drill bits are generally better for hardened steel due to their enhanced durability and heat resistance. However, HSS bits can be a cost-effective alternative for less demanding tasks or softer metals.
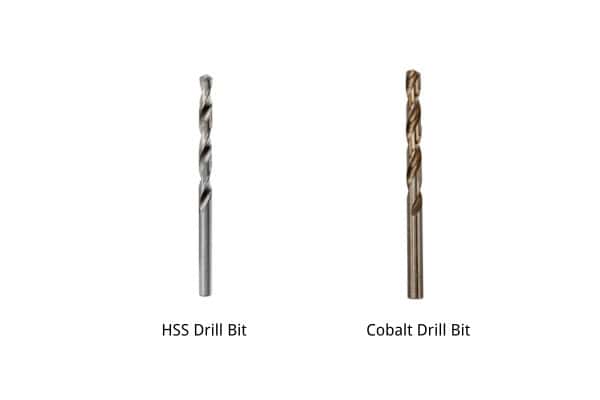
Deciding which bit to use often depends on your specific project needs and budget. Here’s a closer look at both options.
When to Choose Cobalt
Opt for cobalt bits when you’re dealing with very hard materials or projects that require precision and longevity. They’re especially useful in professional settings where reliability is paramount.
Advantages of Cobalt Bits:
- Longer lifespan
- Better performance in high-hardness materials
- Less frequent need for replacement
Personal Experience
Switching to cobalt bits for my toughest projects was a revelation. Not only did they last longer, but the quality of the holes improved dramatically. It was worth every penny for the reliability they provided.
When HSS Bits Are Sufficient
HSS bits are versatile and suitable for a wide range of materials, making them a great choice for general-purpose drilling3. They’re perfect for DIY projects where the materials aren’t excessively hard.
Advantages of HSS Bits:
- More affordable
- Versatile for various materials
- Easier to sharpen
Personal Anecdote
I often use HSS bits for woodworking and softer metals. They’re easy to handle and cost-effective, making them ideal for projects that don’t require the extra durability of cobalt bits. Plus, sharpening them is a breeze, which keeps my workflow smooth.
Making the Right Choice
Consider the specific requirements of your project:
- Material Hardness: For very hard steels, cobalt is the way to go.
- Budget Constraints: HSS bits offer good performance at a lower cost.
- Frequency of Use: For frequent drilling, investing in cobalt bits can save money in the long run.
Practical Tip
Before committing to a set of bits, assess the materials you’ll be working with most frequently. If hardened steel is a common material in your projects, investing in cobalt bits will provide better performance and longevity.
Balancing Cost and Performance
While cobalt bits are more expensive upfront, their durability often justifies the investment. HSS bits, being more affordable, are excellent for less demanding tasks and can be a good starting point for hobbyists or occasional use.
Cost Comparison Table:
| Bit Type | Initial Cost | Langlebigkeit | Performance in Hardened Steel |
|---|---|---|---|
| Kobalt | $$$ | High | Excellent |
| HSS | $$ | Moderate | Good |
Personal Insight
Over time, I’ve found that having a combination of both cobalt and HSS bits in my toolkit allows me to handle a wide range of projects efficiently. Each type has its place, and knowing when to use which bit can enhance the quality and speed of your work.
How to Drill through Hardened Steel Wrenches?
Drilling through hardened steel wrenches might sound tricky, but with the right approach, it’s definitely doable. Here’s how I tackled this specific challenge.
Drilling through hardened steel wrenches requires precision and the right tools. Using a high-quality cobalt drill bit, applying steady pressure, and keeping the bit cool are essential steps to achieve a clean hole without damaging the wrench.
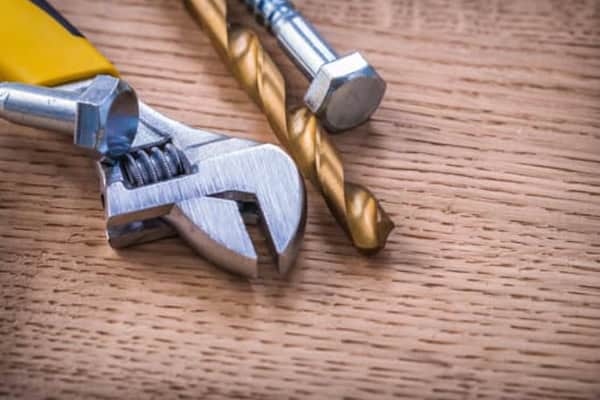
Let’s explore the step-by-step process to ensure your wrenches come out flawless after drilling.
Step-by-Step Guide
-
Prepare Your Tools:
- Choose a cobalt drill bit suitable for the size of the hole you need.
- Gather cutting oil to lubricate the drilling area.
- Secure the wrench firmly to prevent movement during drilling.
-
Mark the Drilling Spot:
- Use a center punch to mark the exact spot where you want to drill. This helps guide the bit accurately.
-
Start Drilling:
- Begin at a slow speed, allowing the bit to create a small indentation.
- Gradually increase speed while maintaining steady pressure.
-
Lubricate Regularly:
- Apply cutting oil frequently to reduce heat and friction.
- This keeps the drill bit cool and extends its lifespan.
-
Maintain Alignment:
- Ensure the drill is perpendicular to the wrench’s surface to create a straight hole.
-
Complete the Hole:
- Continue drilling until you’ve penetrated through the wrench.
- Remove the drill bit carefully to avoid any deformation of the hole.
Detailed Breakdown
Securing the Wrench:
It’s crucial to keep the wrench stable. I often use a bench vise with soft jaws to hold the wrench without causing any dents or scratches. Ensuring the wrench doesn’t move during drilling is key to achieving a straight, clean hole.
Using a Center Punch:
Marking the spot with a center punch creates a small dent that helps guide the drill bit, preventing it from wandering. I always tap the punch lightly with a hammer to make sure the mark is precise.
Starting Slow:
Starting at a slow speed allows the drill bit to bite into the steel without slipping. This initial phase is critical for setting the path of the hole accurately.
Gradual Speed Increase:
Once the bit has a good grip, gradually increasing the speed helps in maintaining control and efficiency. I find that adjusting the speed based on the drilling progress ensures optimal performance.
Troubleshooting Tips
- Bit Skipping: If the bit starts to skip, reduce the speed and reapply cutting oil.
- Overheating: If the bit becomes too hot, pause and let it cool down before continuing.
- Hole Alignment: Double-check the alignment if the hole starts to drift off-center.
Common Issues and Solutions
Bit Skipping:
Sometimes, despite careful marking, the bit may skip. In such cases, stopping and reapplying cutting oil can help stabilize the bit. Applying a bit more pressure gently can also encourage the bit to stay on track.
Overheating:
Overheating is a common issue when drilling hard metals. To combat this, always monitor the temperature of the bit and the workpiece. If you notice excessive heat, stop drilling immediately, allow everything to cool, and reapply cutting oil before continuing.
Hole Alignment:
Maintaining proper alignment is essential for a clean hole. If you notice the hole starting to drift, take a moment to realign the drill bit. Using a drill guide can help in keeping the bit perpendicular to the surface.
Personal Anecdote
Once, I needed to modify a set of heavy-duty wrenches for a custom toolbox. Drilling through the hardened steel was challenging, but by following these steps and staying patient, I achieved perfectly drilled holes. The wrenches fit seamlessly into the toolbox, and the project turned out exactly as I envisioned.
Enhancing Precision with Drill Guides
For those seeking even greater precision, using a drill guide can be immensely helpful. A drill guide ensures that your drill remains steady and perpendicular to the surface, reducing the risk of angled or uneven holes4.
Benefits of Using a Drill Guide:
- Stability: Keeps the drill bit steady during operation.
- Accuracy: Ensures the hole is drilled at the correct angle.
- Ease of Use: Makes the drilling process more manageable, especially for beginners.
Selecting the Right Drill Guide
When choosing a drill guide, consider the following factors:
- Compatibility: Ensure it fits your drill model.
- Adjustability: Look for guides that offer adjustable angles and positions.
- Build Quality: A sturdy, well-built guide will provide better stability and accuracy.
Practical Tip
Investing in a good drill guide can save time and reduce frustration, especially when working on intricate or high-precision projects. It’s a small investment that pays off in the quality and consistency of your work.
Personal Experience with Drill Guides
I experimented with a drill guide for the first time while working on a precision project. The difference was remarkable. The guide kept the drill perfectly aligned, resulting in holes that were straight and consistent. It made the entire process smoother and more enjoyable.
Finishing Touches
After drilling, it’s important to clean up the hole to remove any sharp edges or burrs. This not only improves the appearance but also ensures safety and functionality.
Steps for Finishing:
- Deburring: Use a file or a deburring tool to smooth out any rough edges around the hole.
- Cleaning: Remove any metal shavings or debris from the hole and surrounding area.
- Inspection: Check the hole for accuracy and smoothness, making any necessary adjustments.
Personal Anecdote
In one of my projects, I overlooked the deburring step and ended up with sharp edges that were difficult to handle. Learning from that mistake, I now always take the time to finish the holes properly, ensuring they are safe and functional.
Protecting Your Wrenches
Once the holes are drilled and finished, it’s essential to protect your wrenches from potential damage. Applying a protective coating can prevent rust and wear, extending the lifespan of your tools.
Protective Coating Options:
- Paint: Simple and effective for basic protection.
- Powder Coating: Offers a more durable and professional finish.
- Oil-Based Protectants: Provide a protective barrier against moisture and corrosion.
Personal Tip for Protection
I like to apply a thin layer of oil to my wrenches after drilling. It’s a quick and easy way to protect the metal from rust and keep the tools in good condition.
Fazit
Drilling through hardened steel is challenging but manageable with the right tools and techniques. Cobalt drill bits, proper lubrication, and steady technique are your best allies in achieving precise and clean holes.
-
The strength and heat resistance offered by cobalt drill bits, ensuring they select the appropriate tools for their projects. ↩
-
Offer users insights into various cooling techniques, highlighting the role of lubrication in preventing tool overheating and maintaining performance. ↩
-
Offer insights into the effectiveness and benefits of HSS bits in a wide range of drilling tasks. ↩
-
Help users understand the common causes of inconsistent holes and offer solutions to ensure uniformity and professionalism in their woodworking projects. ↩